Has your trusted yoga mat started showing signs of wear and tear, with small nicks, shallow cuts, or even noticeable scratches? These imperfections, while seemingly minor, can compromise your practice by affecting grip and comfort, and if left unaddressed, can lead to larger, more significant damage. Instead of prematurely replacing your mat, which can be costly and less sustainable, understanding how to effectively repair these common issues can significantly extend its lifespan. This guide will walk you through practical, DIY methods to mend your mat, covering various materials and damage types, helping you restore it to a functional and aesthetically pleasing state.
Understanding Yoga Mat Materials and Their Vulnerabilities
|
Our Picks for the Best Yoga Mat in 2026
As an Amazon Associate I earn from qualifying purchases.
|
||
| Num | Product | Action |
|---|---|---|
| 1 | Amazon Basics Extra Thick Exercise Yoga Mat with Carrying Strap |

|
| 2 | CAP Barbell High Density Exercise Yoga Mat with strap, 68"x24"x 1/2" - Sage Green |
|
| 3 | Retrospec Solana Yoga Mat 1" Thick w/Nylon Strap for Men & Women - Non Slip Exercise Mat for Home Yoga, Pilates, Stretching, Floor & Fitness Workouts |
|
| 4 | Retrospec Solana Yoga Mat 1/2" Thick w/Nylon Strap for Men & Women - Non Slip Excercise Mat for Yoga, Pilates, Stretching, Floor & Fitness Workouts |
|
| 5 | Gruper Yoga Mat Non Slip, Eco Friendly Fitness Exercise Mat with Carrying Strap,Pro Yoga Mats for Women,Workout Mats for Home, Pilates and Floor Exercises |
|
| 6 | Amazon Basics Extra Thick Exercise Yoga Mat with Carrying Strap |
|
| 7 | Amazon Basics Extra Thick Exercise Yoga Mat with Carrying Strap |
|
| 8 | Amazon Basics 1/4 Inch Thick TPE Exercise Yoga Mat with Carrying Strap |
|
| 9 | MICRODRY Deluxe Fitness Exercise Yoga Mat for Home & Gym, Extra Thick for High Impact Training, Multi Layered Skid Resistant Surface, Odor Neutralizing with Carrying Strap |
|
| 10 | Retrospec Solana Yoga Mat 1" Thick w/Nylon Strap for Men & Women - Non Slip Exercise Mat for Home Yoga, Pilates, Stretching, Floor & Fitness Workouts |
|
Before diving into repairs, it’s essential to understand that yoga mats come in various materials, each with unique properties and susceptibilities to damage. PVC (polyvinyl chloride) mats, known for their durability and affordability, can sometimes delaminate or suffer from surface cuts. TPE (thermoplastic elastomer) mats are lighter and more eco-friendly, but might be prone to punctures or stretching. Natural rubber mats offer excellent grip but can develop characteristic “thumb tears” in high-stress areas, especially with consistent hot yoga practice. Jute and cotton mats, being fabric-based, are more likely to fray or snag. Knowing your mat’s material is the first step toward selecting the most effective repair strategy, as different materials respond best to specific adhesives and techniques.
Essential Tools and Materials for Yoga Mat Repair
To successfully mend your yoga mat, having the right tools and materials on hand is crucial. A clean, well-prepped area will ensure your repair is both effective and long-lasting.
Here’s a list of items you might need:
- Cleaning Supplies: Mild soap, rubbing alcohol, clean cloths, and water to thoroughly clean the damaged area.
- Protective Gear: Rubber gloves to protect your hands from adhesives and solvents.
- Masking Tape: Essential for protecting surrounding areas from excess glue and holding torn edges together during drying.
- Applicators: Small paint brushes, spatulas, or even a craft stick for precise adhesive application.
- Adhesives:
- Vinyl Cement: Such as HH-66, ideal for PVC mats due to its strong, flexible, and waterproof bond.
- Shoe Goo/Flexible Repair Glue: Excellent for natural rubber mats, providing a durable and elastic repair for tears and gouges.
- General Foam Adhesive/Contact Cement: Suitable for TPE and other foam-based mats. Look for clear, flexible formulations.
- Hot Glue Gun: Can be effective for small punctures or gouges in foam mats, offering quick adhesion.
- Repair Patches: Some mats, especially natural rubber, benefit from specific repair kits that include matching material patches and rollers for strong adhesion. Tenacious Tape can also be a versatile option for various materials.
- Utility Knife or Scissors: For trimming frayed edges or cutting repair patches.
- Paint Stick/Stirrer: To mix any multi-component adhesives or paints.
- Newspaper or Drop Cloth: To protect your work surface from spills.
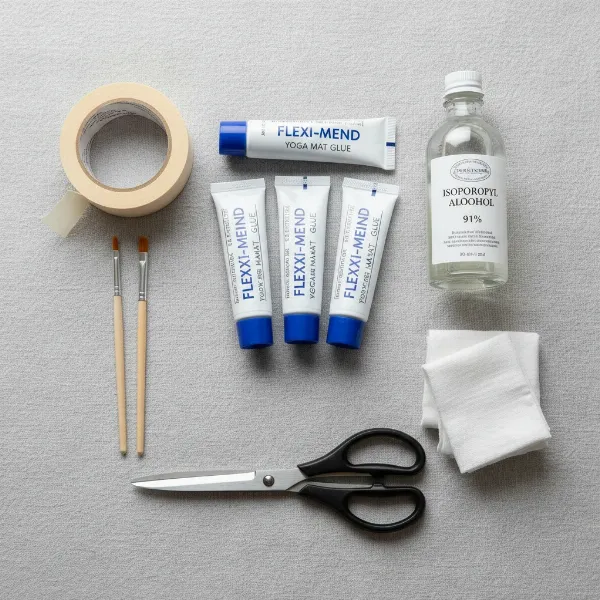 A collection of tools and materials for DIY yoga mat repair, including various glues, tape, cloths, and applicators.
Step-by-Step Guide: Repairing Small Tears and Cuts
Addressing small tears and cuts promptly can prevent them from expanding, saving your mat from irreparable damage. The key to a successful repair lies in meticulous preparation and precise application.
Preparation: The Foundation of a Lasting Repair
Start by thoroughly cleaning the area around the tear or cut using a mild detergent and warm water. For natural rubber mats, an alcohol prep pad or rubbing alcohol can help remove oils and residues, ensuring better adhesion. Allow the area to dry completely. Once clean and dry, apply masking tape along the outer edges of the tear, creating a protective barrier around the damaged section. This prevents excess adhesive from spreading onto the undamaged surface, keeping your mat looking tidy. For deeper cuts or holes, ensure any loose debris within the tear is removed, creating a clean channel for the adhesive.
Applying Adhesive: Mending the Gap
With the area prepped, it’s time for the adhesive. For shallow tears, use a small brush or applicator to spread a thin, even layer of your chosen glue (HH-66 for PVC, Shoe Goo for natural rubber, or appropriate foam adhesive for TPE/foam) onto both exposed edges of the tear. Allow the glue to become slightly “tacky” – usually for about 5-10 minutes, depending on the product’s instructions. Once tacky, carefully press the torn edges together, holding them firmly for a few minutes. For deeper cuts, you might need to fill the void with more adhesive, ensuring good contact between the surfaces. If using hot glue for foam mats, apply a bead directly into the puncture or gouge, then gently press the edges together or level the surface.
Using Repair Patches: A Stronger Solution for Larger Damages
For larger tears or areas where the mat material has been lost, a repair patch can provide additional strength and coverage. Many specialized yoga mat repair kits, like those from Dollamur, include pre-cut patches and a roller. If creating your own, cut a patch from a similar material that is slightly larger (about 1.5 times) than the tear itself, ensuring rounded corners to prevent lifting. Apply adhesive to the underside of the patch and the mat surface around the tear. Carefully place the patch over the damaged area, aligning it smoothly. Use a roller or firm pressure to eliminate air bubbles and ensure strong bonding. Patches are especially effective for natural rubber mats that develop “thumb tears,” providing a reinforced barrier.
Drying and Curing: Patience is Key
Once the adhesive or patch is applied, it’s crucial to allow ample time for drying and curing. Remove any masking tape carefully before the glue fully hardens to avoid pulling up the repair. Place new masking tape directly across the repaired area to hold the tear in place while the adhesive sets. Most glues require at least 24 hours to fully cure, although some, like contact cements, might set faster. Refer to the specific product instructions for exact drying times. Rushing this step can compromise the repair’s durability, leading to the tear reopening under pressure. A properly cured repair will be flexible and strong, ready for your next yoga session.
Tackling Scratches and Surface Abrasions
Scratches and surface abrasions are often more cosmetic than structural, but deeper ones can still affect grip or lead to further deterioration. Deciding whether to repair them depends on their depth and how much they impact your practice.
Assessment and Cleaning
First, assess the depth of the scratch. Superficial scuffs might not require any repair, as some yogis even find they can slightly improve traction. However, if the scratch is deep enough to create a noticeable groove or if you see signs of crumbling material, a repair is advisable. Begin by thoroughly cleaning the scratched area with a mild soap solution or rubbing alcohol to remove any dirt, oils, or loose particles. Ensure the area is completely dry before proceeding.
Repairing Light Scratches
For very light scratches that bother you aesthetically, you might try gently buffing the area with a soft, damp cloth. Some mat materials can show minor improvements with this method. However, many light scratches on resilient mats like natural rubber or PVC often don’t progress into larger issues and may simply become part of your mat’s unique character. As some practitioners suggest, these minor imperfections can even enhance grip.
Mending Deeper Scratches and Gouges
Deeper scratches or gouges require a bit more attention. For natural rubber mats, a small amount of Shoe Goo or a similar flexible, rubber-based adhesive can be carefully applied into the scratch using a toothpick or a fine applicator. Spread it evenly and smoothly, then allow it to dry completely. The flexible nature of these glues helps them integrate seamlessly with the mat’s material. For PVC mats, if the scratch is significant, a specialized vinyl repair paint matching your mat’s color can be used to fill and seal the groove. Apply a thin coat, allow it to dry, and apply a second if needed, ensuring a smooth finish. The goal is to fill the void and create a level, sealed surface that won’t catch or peel during use. Always ensure proper ventilation when working with adhesives and paints.
Special Considerations for Different Yoga Mat Materials
The effectiveness of a repair often hinges on selecting the right method and material for your specific yoga mat type. What works wonders for a PVC mat might not be suitable for natural rubber.
PVC/Vinyl Mats
PVC mats are typically durable, but when they do tear or scratch deeply, specialized products offer the best repair. For tears and cuts, HH-66 Vinyl Cement is highly recommended due to its strong, waterproof bond that remains flexible. Before applying, you might use an MPK solvent (if available and recommended by the glue manufacturer) to “activate” the existing vinyl surface, allowing the new adhesive to bond more effectively. For surface scratches or areas where color has been lost, specific vinyl repair paints can fill and color-match the damaged area, restoring the mat’s appearance.
Natural Rubber Mats
Natural rubber mats, prized for their superior grip and eco-friendly properties, can develop “thumb tears” or small punctures. For these, Shoe Goo or other flexible, rubber-based adhesives work well to fill and seal the damaged area, maintaining the mat’s elasticity. Some dedicated yoga mat repair kits designed for rubber mats include patches that can be applied over tears, often with a roller to ensure maximum adhesion. Cleaning the area with rubbing alcohol before repair is particularly important for rubber mats to remove natural oils and ensure a clean bonding surface.
TPE/Foam Mats
TPE and other foam-based mats are generally softer and lighter. Small punctures or shallow gouges in these mats can often be mended effectively with a hot glue gun. Apply a small amount of hot glue into the damage, pressing the edges together while it’s still warm, then carefully scraping away any excess once cool. For larger tears, a flexible contact cement or general purpose foam adhesive can be used. Ensure the adhesive is compatible with foam and dries clear and flexible to avoid stiff spots.
Jute/Cotton Mats
Jute and cotton mats are less common for dynamic practices and more often used for restorative yoga or meditation. Tears or frays on these natural fiber mats are more challenging to “glue” seamlessly without affecting their texture. Small frays can sometimes be trimmed carefully. For actual tears, a fabric adhesive might work, or a simple, strong stitch with a heavy-duty needle and thread could be a more natural-looking and durable solution. Due to their absorbent nature, liquid adhesives can sometimes stiffen the fabric, so a careful, minimal application is key.
Maintaining Your Mat to Prevent Future Damage
Preventing damage is always better than repairing it. Adopting a few simple maintenance habits can significantly prolong your yoga mat’s life and minimize the need for repairs.
- Regular Cleaning: Sweat, oils, and dirt can degrade mat materials over time. Clean your mat after every few uses (or after each intense session) with a gentle, mat-specific cleaner or a DIY solution of water and white vinegar. This removes grime and preserves the material’s integrity.
- Proper Storage: Always roll your mat loosely, rather than folding it, to prevent creases, cracks, and pressure points that can lead to tears. Store it in a cool, dry place away from direct sunlight, which can dry out and damage certain materials, especially natural rubber.
- Avoid Sharp Objects: Keep sharp jewelry, keys, or pet claws away from your mat during storage and practice. Even a small scratch can escalate into a larger tear with repeated use.
- Use a Yoga Towel: For hot yoga or practices where you sweat heavily, placing a yoga towel over your mat provides an extra layer of protection against moisture, friction, and wear, particularly in high-contact areas like hands and feet.
- Rotate Your Mat: If you consistently practice in the same spot, consider rotating your mat regularly to distribute wear and tear evenly across its surface.
Top Repair Products for Yoga Mats
When it comes to choosing repair products, quality and compatibility are paramount. Investing in the right adhesive or kit can make all the difference in achieving a lasting fix.
- HH-66 Vinyl Cement: Widely regarded as the industry standard for PVC and vinyl-coated materials, HH-66 provides an incredibly strong, flexible, and waterproof bond. It’s excellent for wrestling mats and can be effectively used on PVC yoga mats for rips and tears.
- Shoe Goo: This versatile, flexible adhesive is a favorite for repairing rubber products. Its strong, rubberized bond makes it ideal for mending tears and filling gouges in natural rubber yoga mats, maintaining the mat’s elasticity.
- Dollamur Mat Repair Kit: While often marketed for wrestling or gymnastics mats, Dollamur offers repair kits that include matching vinyl patches and application rollers, which can be adapted for larger tears on certain vinyl-like yoga mats. Always check for material compatibility.
- Tenacious Tape: A highly durable, waterproof repair tape that can be a quick fix for small tears on various mat surfaces. It provides an immediate seal and can withstand outdoor conditions, making it a good emergency solution.
- General Purpose Flexible Adhesives (e.g., E6000 Craft Adhesive): For TPE or general foam mats, a clear, strong, and flexible craft adhesive can often do the trick. Always test a small, inconspicuous area first to ensure it doesn’t degrade the mat material.
Buying Guide for Repair Materials
Choosing the right repair solution can feel overwhelming with so many options. Consider these factors to make an informed decision and find the best products for your mat’s specific needs.
- Budget: DIY repairs are generally much more cost-effective than buying a new mat. Basic glues are inexpensive, while specialized repair kits may cost a bit more but offer a complete solution for specific mat types. Determine how much you’re willing to spend versus the value of extending your mat’s life.
- Mat Material: This is the most critical factor. Always match your repair product to your mat’s material. Using vinyl cement on a natural rubber mat, for example, might yield poor results or even further damage. Check product descriptions for compatibility (e.g., “for PVC,” “for rubber,” “for foam”).
- Type and Severity of Damage: For small, shallow scratches, simple cleaning and maybe a flexible filler might suffice. For deeper tears or holes, a strong adhesive or a repair patch will be necessary. Punctures in foam might benefit from hot glue, while edge fraying on fabric mats could need stitching.
- Environmental Impact and Safety: If sustainability is a priority, look for adhesives that are labeled as low-VOC (volatile organic compounds) or non-toxic. Always work in a well-ventilated area when using strong glues or solvents, and wear gloves to protect your skin.
- Ease of Use: Some products are designed for quick, simple application, while others require more steps and curing time. Consider your comfort level with DIY projects and the time you have available for the repair.
Conclusion
Your yoga mat is more than just a piece of equipment; it’s a foundation for your practice, absorbing your efforts and supporting your journey. While small tears and scratches are an inevitable part of its life, they don’t have to signal the end. By understanding your mat’s material and employing the right tools and techniques, you can effectively repair these minor imperfections, restoring its functionality and extending its lifespan. Embracing DIY repairs is not only a cost-effective solution but also a sustainable choice, reducing waste and honoring your investment. So, the next time you spot a blemish, don’t despair – empower yourself with these repair methods and continue your practice on a mat that feels good as new. What small repair will you tackle first to give your yoga mat a second life?
Frequently Asked Questions
Can I use super glue on my yoga mat for repairs?
While super glue (cyanoacrylate) provides a very strong bond, it often dries rigidly and can make the repaired area stiff and brittle. This lack of flexibility can lead to the glue cracking or causing further tears around the repair site when the mat is rolled or stressed during practice. For flexible materials like yoga mats, it’s generally better to use a flexible adhesive designed for fabric, rubber, or vinyl.
How often should I clean my yoga mat after repair?
You should clean your yoga mat regularly, ideally after every few uses or after any particularly sweaty session, even after a repair. Regular cleaning helps remove sweat, oils, and dirt that can degrade the mat material over time and potentially weaken a repair. Use a gentle, mat-specific cleaner or a diluted white vinegar solution to avoid harsh chemicals that could react with the adhesive.
What if my mat tears again in the same spot after repair?
If your mat tears again in the exact same spot after a repair, it often indicates that the underlying material in that area is significantly weakened, or the initial repair method was not sufficient for the stress it endures. For a recurring tear, consider using a stronger adhesive, applying a larger or more robust patch, or reinforcing the area with an additional layer of material if possible. If the mat material is too degraded, it might be time to consider a replacement.
Are yoga mat repair kits worth it?
Yoga mat repair kits can be a worthwhile investment, especially if they are specifically designed for your mat’s material (e.g., rubber or PVC). These kits often contain pre-matched patches, specialized adhesives, and tools like rollers, making the repair process more straightforward and the results more durable. While some DIY solutions are effective, kits provide a comprehensive and often more reliable approach for common mat damages.
How can I prevent my cat from scratching my yoga mat?
To prevent your cat from scratching your Yoga Mat, store it rolled up and ideally in a mat bag or a closet where it’s inaccessible. You can also try spraying the mat with a cat-repellent spray (ensure it’s safe for your mat material and won’t affect grip), or placing deterrents like crinkled aluminum foil or double-sided tape on areas your cat tends to target when the mat is out. Providing alternative scratching posts and toys can also redirect their attention.